
Lithium Battery Smart
circuit board replacement
instruction
Rev 00 - 10/2022
ENGLISH

Table of Contents
1. Introduction and safety ............................................................................................................. 1
2. Lithium Battery Smart spare parts list ........................................................................................... 2
3. Opening the battery case ........................................................................................................... 3
4. Replacing the circuit board ........................................................................................................ 4
5. Closing the battery case ............................................................................................................ 6
Lithium Battery Smart circuit board replacement instruction
1. Introduction and safety
Before following the instructions in this document make sure to first troubleshoot the battery. Follow the troubleshooting
instructions in the Lithium Battery Smart manual, see https://www.victronenergy.com/media/pg/Lithium_Battery_Smart/en/
troubleshooting-support-and-warranty.html.
• In case of a cell fault, the battery is irreparable. We do not supply spare cells.
• In case of a circuit board fault, the battery is repairable. We supply spare circuit boards.
This repair instruction describes how to replace the Lithium Battery Smart circuit board with a spare.
This instruction is also available as a video:
https://www.youtube.com/embed/FNS1U5ofeGE
Note that in this instruction, photos of a 200Ah 12.8V battery are used. The other battery models have slightly different circuit
boards and cell layouts, but the general method of replacing the circuit board is the same. Refer to the Lithium Battery Smart
spare parts list on the next page for the part number and a photo of the circuit board for each battery model.
WARNING - HIGH RISK OF ACCIDENTAL SHORT CIRCUIT!!
Short circuits of lithium batteries can be highly hazardous. If you don't understand the risks of exposing
battery cell terminals and the consequences of short circuits in lithium batteries, you must not carry out this
procedure. This information is presented for competent personnel intending to work from a bench top in an
uncluttered space.
This procedure is made publicly available for the benefit of those who are comfortable with, and able to, carry
out the repair themselves.
In case you are not, this is not a problem. Contact your dealer to arrange for the repair to be carried out by an
authorised person.
When performing repairs on a lithium battery, be aware that you are working on live equipment. Although
the voltages are not that high (12.8 or 25.6V), the battery can supply very high currents in case of a short
circuit. Take special care not to accidentally short circuit the positive and negative battery terminals, battery
cell terminals or busbars. Always use insulated tools.
Lithium Battery Smart circuit board replacement instruction
Page 1 Introduction and safety

2. Lithium Battery Smart spare parts list
The table below lists the battery model, part number and what circuit board part number is used in that particular battery. The list
also shows if the lid is screwed or glued onto the battery.
Battery part
number
Battery description
Circuit board
part number
Lid Image
BAT512050610
LiFePO4 Battery
12.8V/50Ah Smart
SBP210050000
Glued up to HQ2132
Screwed from
HQ2132
BAT512110610
LiFePO4 Battery
12.8V/100Ah Smart
SBP210110020
Glued up to HQ2115
Screwed from
HQ2116
BAT512116610
LiFePO4 Battery
12.8V/160Ah Smart
SBP210116020
Glued up to HQ2119
Screwed from
HQ2120
BAT512120610
LiFePO4 Battery
12.8V/200Ah Smart
SBP210120020
Glued up to HQ2111
Screwed from
HQ2112
BAT512132410
LiFePO4 Battery
12.8V/330Ah Smart
SBP210132120 Screwed
BAT524110610
LiFePO4 Battery
25.6V/100Ah Smart
SBP220110020 Screwed
BAT524120610
LiFePO4 Battery
25.6V/200Ah-a
Smart
SBP220120020 Screwed
BAT512060410
LiFePO4 Battery
12.8V/60Ah Smart
(EOL)
SBP210060000 Glued
BAT512130410
LiFePO4 Battery
12.8V/300Ah Smart
(EOL)
SBP210130000 Glued
BAT524120410
LiFePO4 battery
25.6V/200Ah Smart
(EOL)
SBP210120120 Glued
Lithium Battery Smart circuit board replacement instruction
Page 2 Lithium Battery Smart spare parts list
3. Opening the battery case
There are three different battery case types. The way the battery is opened differs for each different battery case type:
• Situation 1: The battery case has screws that are visible on top of the battery.
• Situation 2: The battery case does not have screws that are visible on top of the battery and has ventilation slots.
• Situation 3: The battery case does not have screws that are visible on top of the battery and does not have ventilation slots.
These are the instructions for each situation:
Opening instructions for situation 1:
• Remove the two large aluminium nuts from the terminals.
• Remove all Philips head screws from the top cover.
• Lift the lid upwards to remove it.
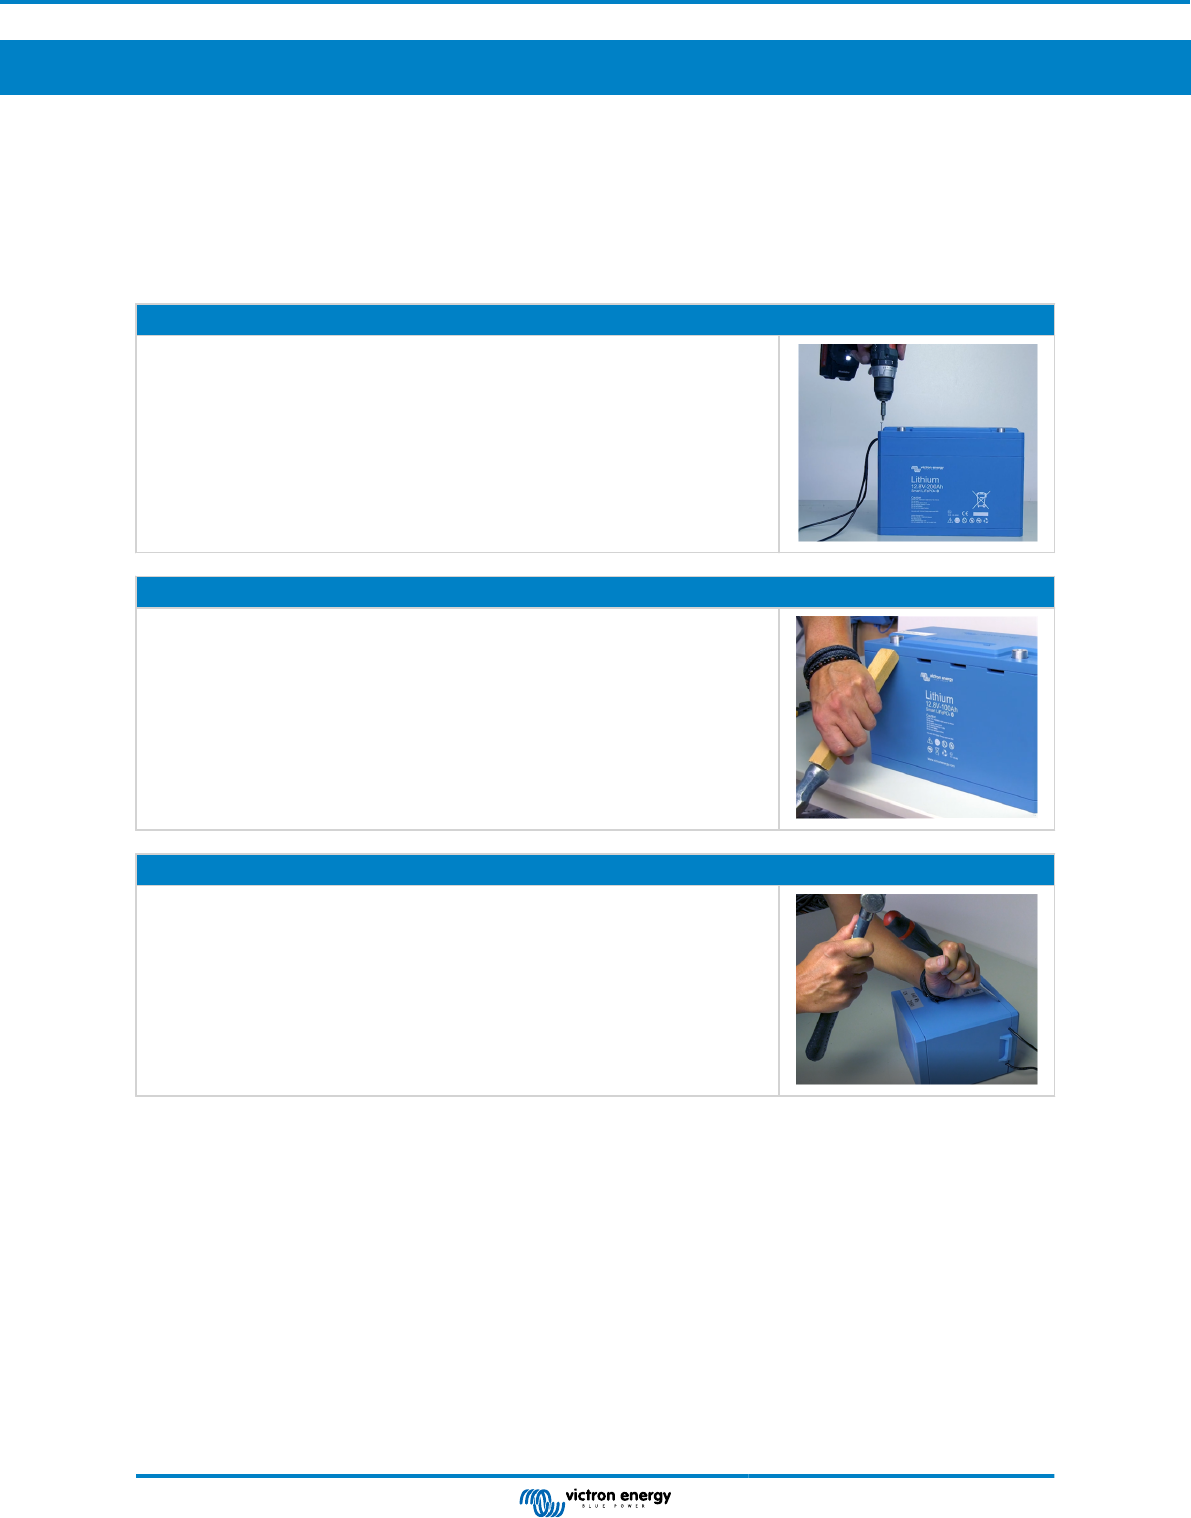
Opening instructions for situation 2:
• Remove the two large aluminium nuts from the terminals.
• Using a piece of wood and a hammer, tilt the piece of wood up into one of the
ventilation holes and give the piece of wood a short and firm tap with the hammer.
• Repeat for each ventilation hole.
• Lift the lid upwards to remove it.
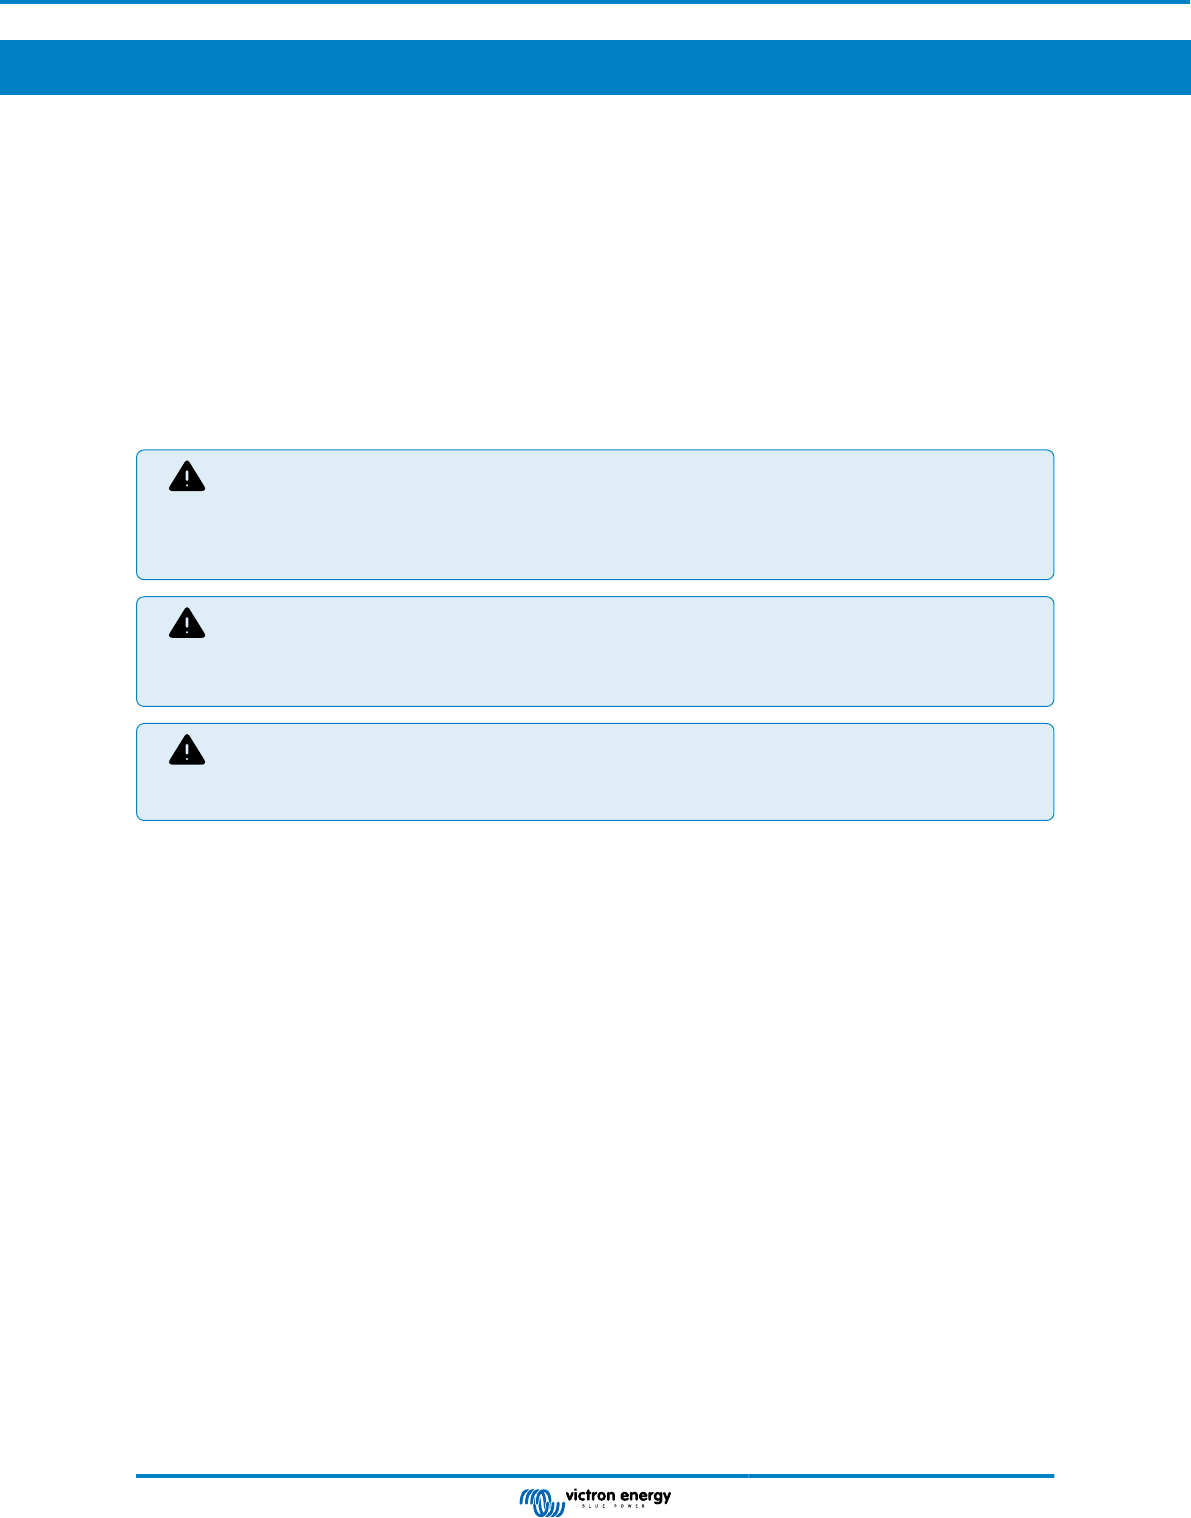
Opening instructions for situation 3:
• Remove the two large aluminium nuts from the terminals.
• Using a large flat head screwdriver and a hammer, lay the battery on its side
and place the screwdriver at an angle in the seam between the top cover and
the battery case, and give a few short and firm taps on the screwdriver with the
hammer.
• Repeat at regular intervals around the battery.
• Place the battery upright and lift the lid upwards to remove it.
Lithium Battery Smart circuit board replacement instruction
Page 3 Opening the battery case
4. Replacing the circuit board
High risk of accidental electrical short circuit. Perform at your own risk.
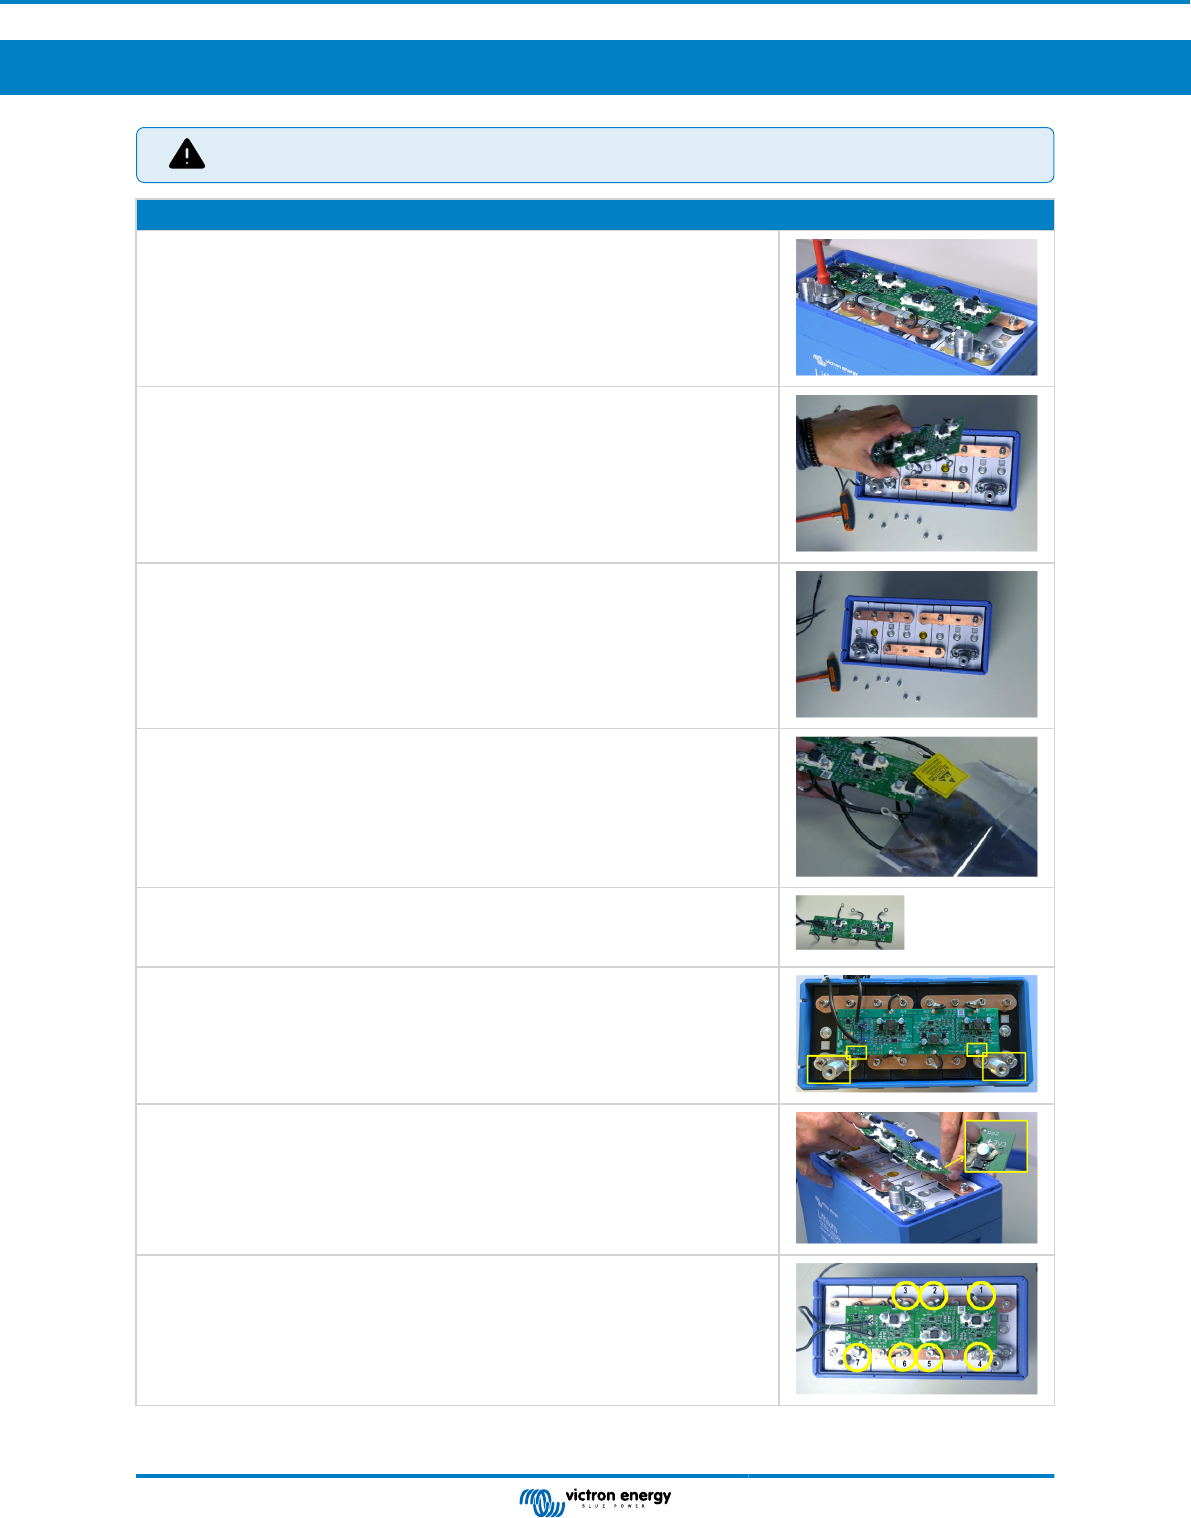
Replacement instructions:
Step 1:
• Loosen and remove the bolts that hold the circuit board wires.
• CAUTION: for models where the busbar comes loose, do not remove the bolt but
replace them after the circuit board wire is removed.
• Leave the other bolts in place.
Step 2:
• Remove the circuit board.
Step 3:
• The image on the right shows the battery without the circuit board.
Step 4:
• Remove the new circuit board from its anti-static bag.
Step 5
• Bend all circuit board wires upward. This prevents an accidental connection
between a wire and the wrong busbar or battery cell.
Step 6:
• Position the circuit board above the battery.
• Ensure that the "BAT +" text is at the positive terminal and the "BAT –" text is at the
negative terminal.
Step 7:
• Insert the top right-hand circuit board wire, with the text "+ 3V3", to the top right-
hand busbar.
• Hand tighten the bolt using your fingers.
Step 8:
• Repeat this for the other circuit board wires.
Lithium Battery Smart circuit board replacement instruction
Page 4 Replacing the circuit board
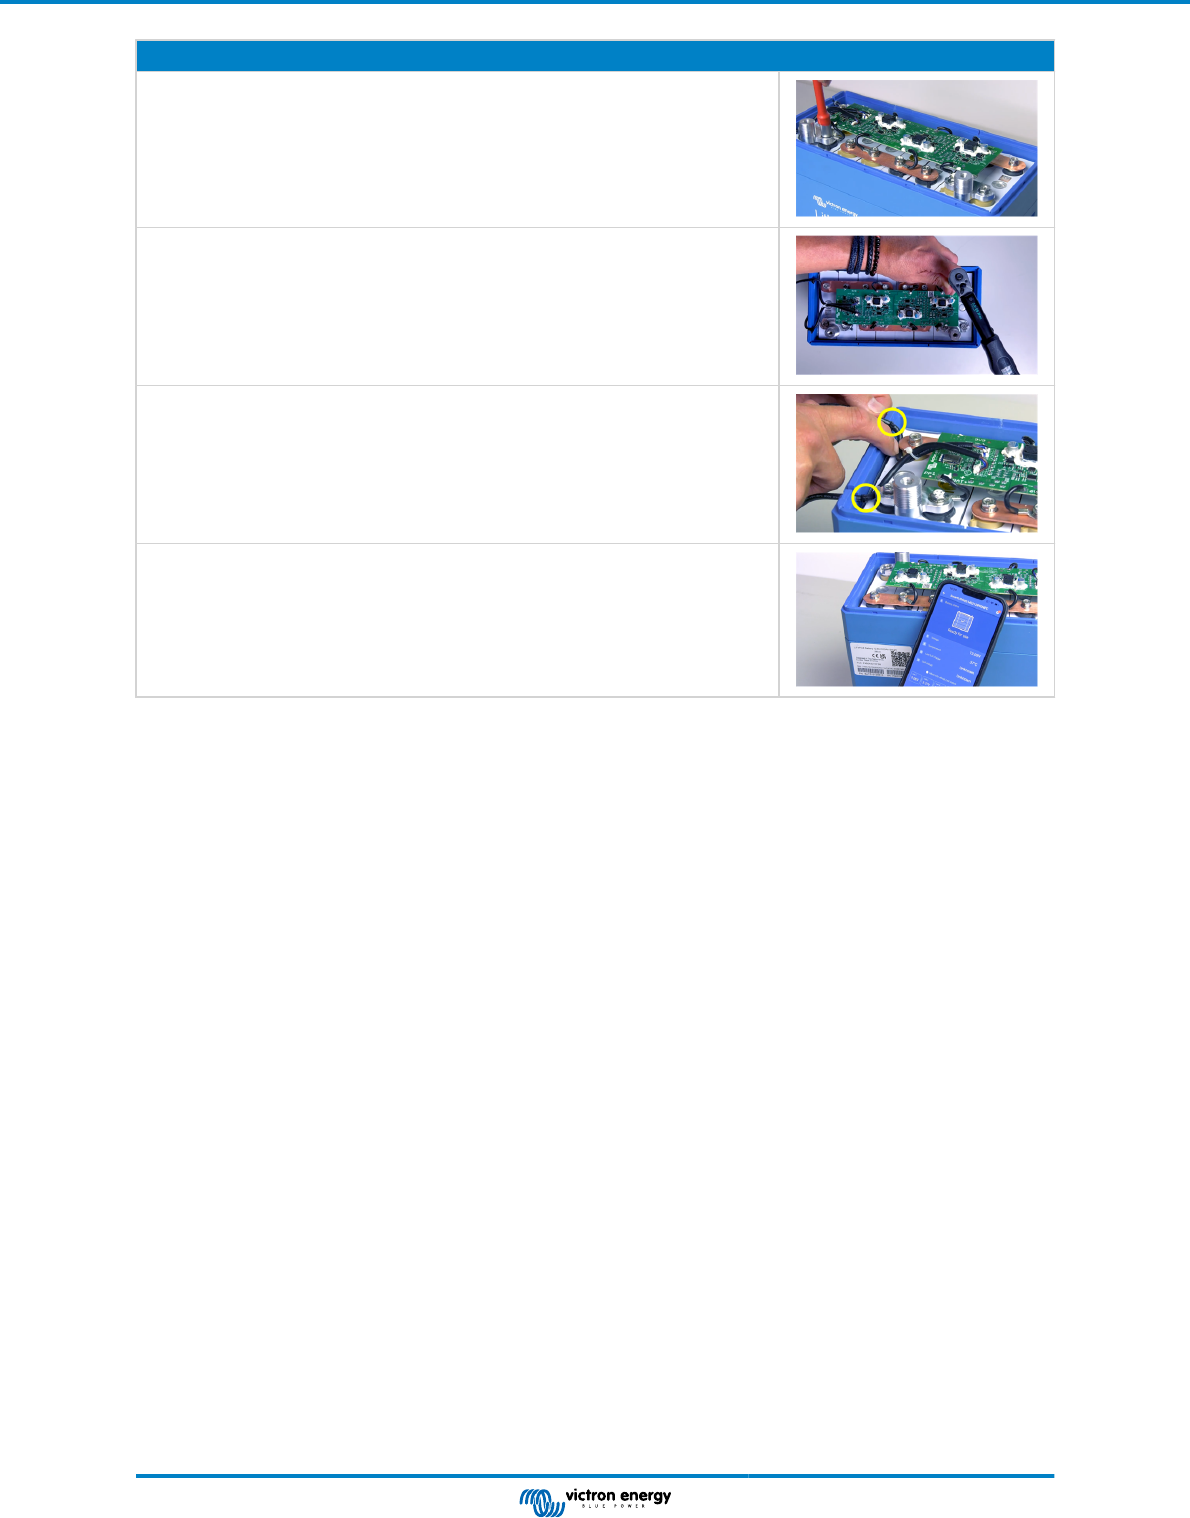
Replacement instructions:
Step 9:
• Hand tighten all bolts using a tool.
Step 10:
• Further tighten the bolts to 10Nm, using a torque wrench.
Step 11:
• Use two cable ties as strain relief for the two BMS cables.
• A new pair of cable ties are included with the circuit board.
Step 12:
• Confirm that the circuit board is functioning correctly before closing the cover.
• Connect to the battery with the VictronConnect app and check that everything looks
all right.
Lithium Battery Smart circuit board replacement instruction
Page 5 Replacing the circuit board
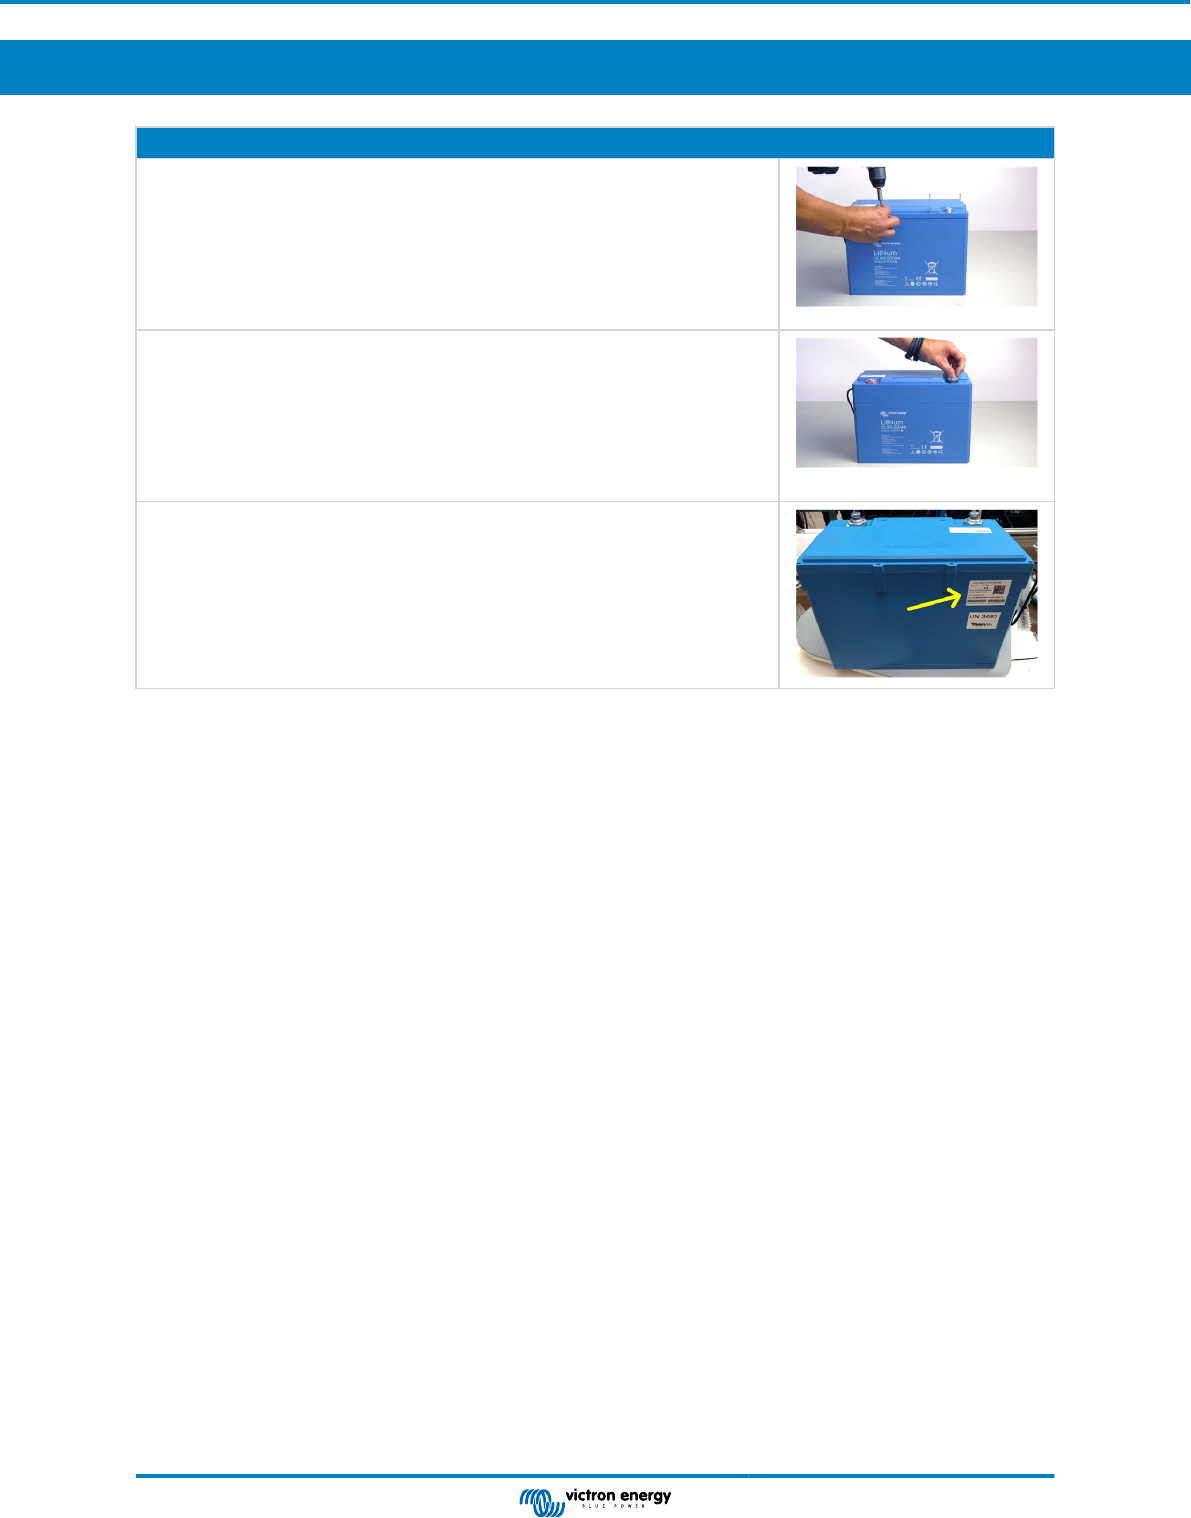
5. Closing the battery case
Closing instructions:
Step 1:
• Place the lid back on the battery.
• In case the battery has screws, place and tighten the screws. Use a low torque
setting, and do not over-tighten the screws to avoid damaging the screw holes.
• In case the battery was glued, use super glue to glue the lid back on. Use the glue
sparingly.
Step 2:
• Fasten the two aluminium terminal nuts (hand-tight).
• Take care that the top of the nut is at least 2 to 3 mm under the top of the battery
terminal.
• Do not over-tighten the nut to prevent the cover from being pulled down too much
and possibly damaged.
Step 3:
• The spare circuit board came with a new serial number sticker including puk code
and other details.
• Affix this new sticker over the old one.
Lithium Battery Smart circuit board replacement instruction
Page 6 Closing the battery case
